

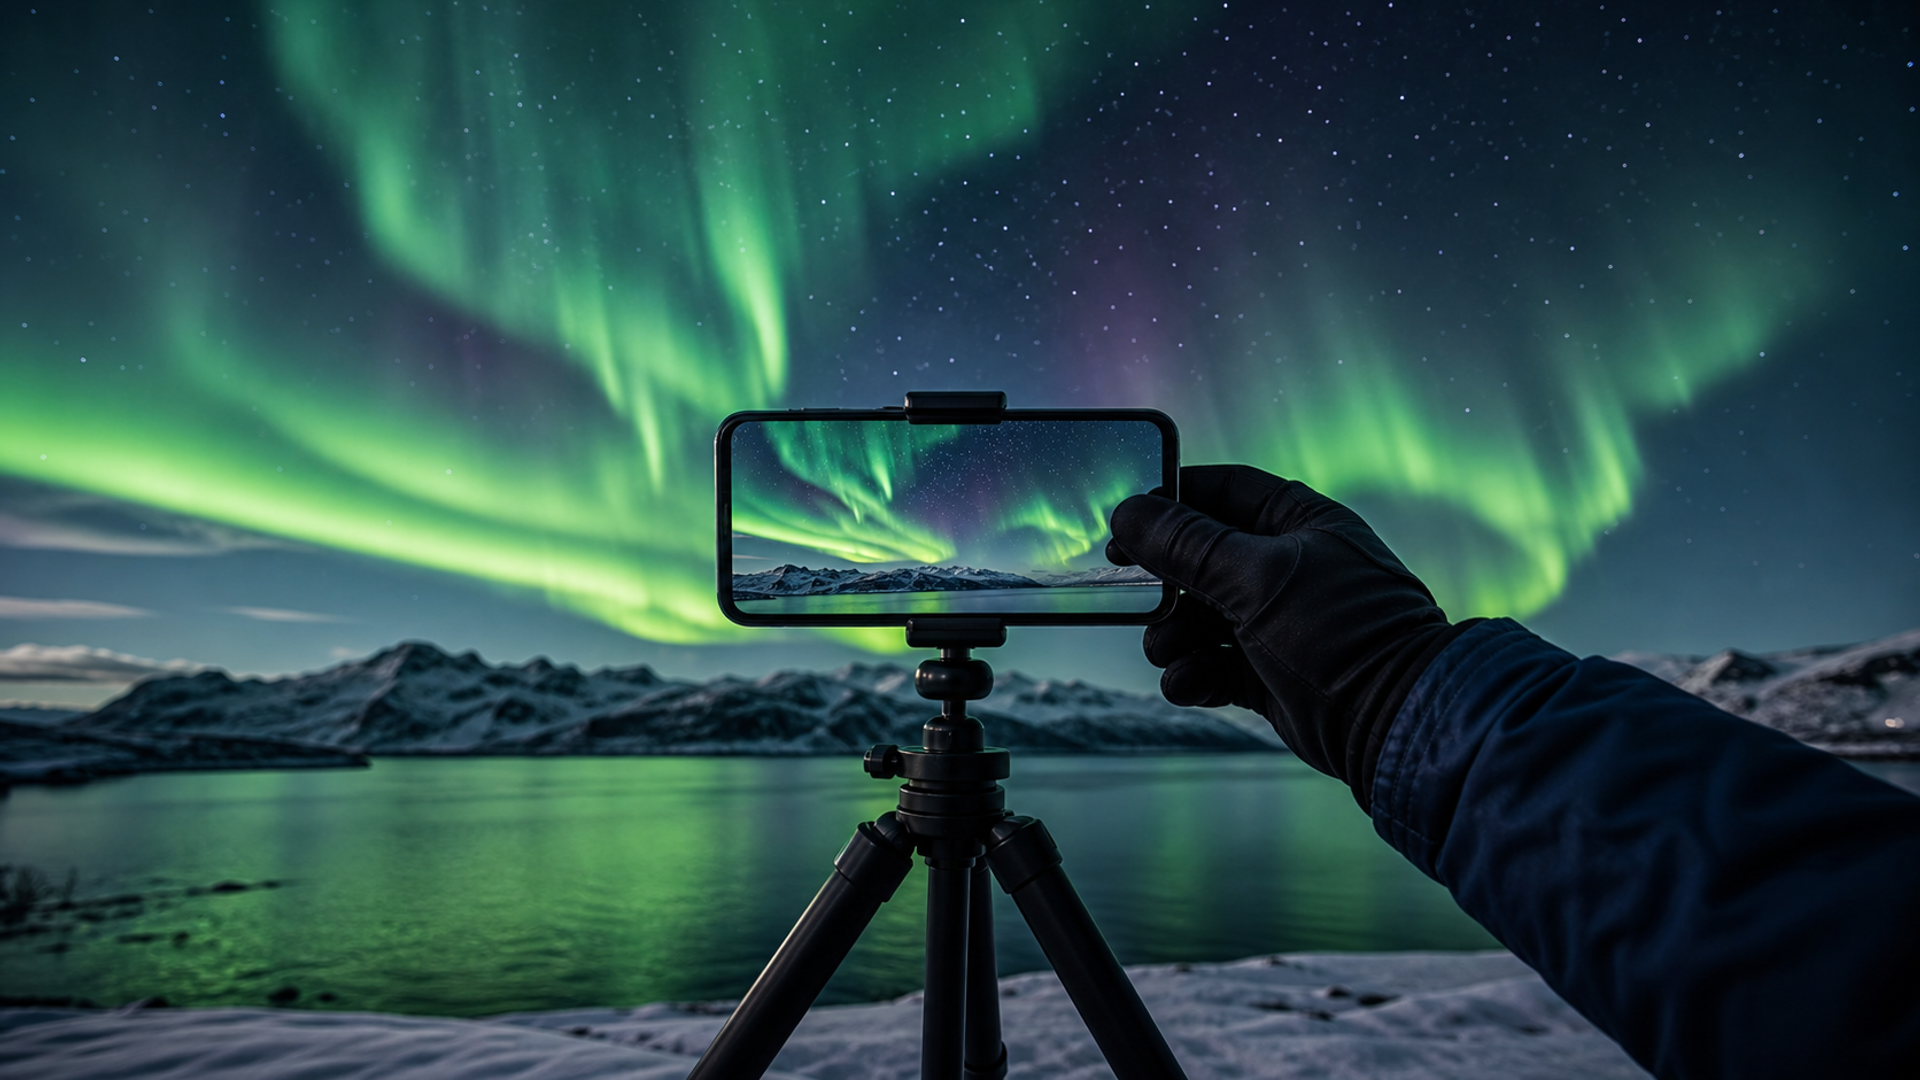
To learn how to photograph northern lights on a phone, start with the shortest exposure that records the colour: use ordinary Photo mode for a bright, fast-moving aurora; Night mode for a dimmer display; and Manual or Pro mode when you need to control shutter speed, ISO and focus. Keep the phone completely still, turn off the flash, begin with the main 1× camera and shorten the exposure whenever the curtains lose their shape. There is no universal setting because aurora brightness, motion, moonlight, snow, city glow and phone processing all change the exposure.
The practical mode ladder is simple:
Bright and visibly moving: try ordinary Photo mode first. A sharp one-second-equivalent frame is more useful than a luminous ten-second blur.
Visible but weak: secure the phone and use Night mode, beginning with the shortest available capture rather than assuming “Max” is best.
Manual controls available: bracket a short, medium and long exposure. Keep the cleanest frame that preserves the aurora's structure, not necessarily the brightest one.
Why one “best setting” fails
The northern lights are both a light source and a moving subject. A longer exposure gathers more light, but it also merges folds, rays and rapidly changing edges. A higher ISO can make a weak display recordable, but it increases noise and leaves less room for bright green highlights. Ambient light introduces another constraint: a moonlit snowfield or nearby town may expose correctly long before the sky does.
Phone modes complicate the comparison. Ordinary Photo mode usually makes a quick, highly processed exposure. Night mode may combine several frames over a displayed capture period; that number is not necessarily the shutter speed of one frame. Manual or Pro mode exposes the controls your particular device supports, but the available lenses, ISO range, raw format and processing vary by model and software version.
That is why manufacturer guidance is useful for behaviour, not for a universal recipe. Apple's current Night mode guide says supported iPhones choose exposure time automatically, allow a choice among available exposure options and benefit from a tripod. Google's Pixel Camera guidance likewise requires the phone to remain steady for Night Sight and recommends a tripod, a timer and “far” focus for night-sky work. Neither promises that the longest capture will freeze a moving aurora.
Prepare the phone before the sky changes
Aurora photography rewards preparation because the strongest structure may last only a short time. Complete this setup indoors or beside the vehicle, not while a bright arc is already developing:
Clean the main camera lens. Condensation, snow and fingerprints turn stars and distant lights into halos.
Fit a stable clamp and tripod. A coat pocket or handrail can work in an emergency, but it is harder to repeat the same composition while changing exposure.
Use a two- or three-second timer. The delay lets vibration from the shutter tap settle. Google's guidance specifically recommends a three-second timer for a steadier night-sky capture.
Turn the flash off. It cannot illuminate the aurora and can spoil the foreground or another photographer's exposure.
Start at the main 1× camera. On many phones it has the most capable low-light system. Treat that as a testable starting point, not a specification that applies to every device.
Preserve battery and storage. Cold can shorten useful shooting time, while raw files and repeated Night captures fill storage quickly. Keep the phone protected between sequences and verify space before leaving.
Check the sky close to shooting time. NOAA's Aurora 30-Minute Forecast estimates location and intensity 30 to 90 minutes ahead. It is a situational tool, not a guarantee of clear cloud, a dark foreground or a display at your exact viewpoint.
Composition matters as much as sensitivity. Include a recognisable mountain, cabin, road or reflection, but avoid a lamp shining directly into the lens. If the foreground is important, make one exposure for it and one for the sky rather than forcing a single frame to solve two incompatible light levels.
Exposure-settings matrix by phone capability, aurora strength and ambient light
Use the matrix as a starting sequence, then change one control at a time. “Strong” means clearly coloured, structured and visibly moving to the eye; “moderate” means visible colour or form without intense motion; “faint” means a pale arc or haze that the phone may see more clearly than you do. The Manual/Pro figures are conservative editorial starting bands, not manufacturer presets or guaranteed settings. Phone sensors and processing differ, and Night mode capture duration is not directly comparable with a single manual shutter speed.
| Phone capability | Aurora strength | Ambient light | Start in | Starting exposure control | ISO starting point | What to inspect after the shot |
|---|---|---|---|---|---|---|
| Ordinary camera only | Strong | Dark rural sky | Photo, 1× | Auto; lower the exposure slider by roughly 0.3–1 EV if green areas clip | Auto | Are rays crisp and stars points? Keep this mode while they are. |
| Ordinary camera only | Strong | Moonlit snow or town glow | Photo, 1× | Auto; expose for the brightest snow, lamp or green curtain | Auto | Check that foreground highlights retain texture and the sky is not grey. |
| Ordinary camera only | Moderate | Dark rural sky | Photo, braced | Auto; tap a distant bright edge, then take several steady frames | Auto | If colour disappears or noise smears detail, move to Night mode if available. |
| Ordinary camera only | Faint | Any | Photo, braced | Auto; do not rely on digital zoom or flash | Auto | The hardware may not record a useful frame. Preserve the view rather than inventing detail in editing. |
| Night mode | Strong and fast | Dark rural sky | Night, 1× | Choose the shortest available capture; avoid Max initially | Automatic/computational | Look for doubled stars, softened curtains and a sky brighter than the scene felt. |
| Night mode | Moderate | Dark rural sky | Night on tripod | Begin around a 1–3 second displayed capture if selectable | Automatic/computational | Increase duration only if colour remains too weak and motion still looks natural. |
| Night mode | Faint | Dark rural sky | Night on tripod | Try roughly 3–10 seconds or the device's next longer option | Automatic/computational | Compare structure, noise and star shape; the longest frame may not be the best. |
| Night mode | Any | Moonlit snow or town glow | Night on tripod | Use a shorter option and reduce brightness/exposure where supported | Automatic/computational | Watch the histogram or preview for clipped snow, lamps and neon-green colour. |
| Manual/Pro with focus control | Strong and fast | Dark rural sky | Pro/Manual, raw+JPEG if offered | 0.25–1 second; focus far/infinity; widest supported aperture | ISO 400–800 | Shorten shutter first if rays merge; raise ISO only enough to hold colour. |
| Manual/Pro with focus control | Moderate | Dark rural sky | Pro/Manual on tripod | 1–4 seconds; focus far/infinity | ISO 800–1600 | Bracket one stop shorter and longer; choose definition over brightness. |
| Manual/Pro with focus control | Faint | Dark rural sky | Pro/Manual on tripod | 4–10 seconds; focus far/infinity | ISO 1600–3200, if the phone remains usable there | Expect more noise and motion blur; stop when longer exposure adds haze rather than information. |
| Manual/Pro with focus control | Any | Moonlit snow or town glow | Pro/Manual on tripod | Roughly 0.25–2 seconds, adjusted to highlights | ISO 100–800 | Keep the foreground below clipping; accept a darker sky if necessary. |
These phone bands intentionally start shorter than many dedicated-camera guides. For context, Canon's aurora guide suggests 5–15 seconds and ISO 1600 or 3200 as a general interchangeable-camera starting point, while explicitly recommending shorter exposures for faster aurora. A large camera with a bright lens is not a phone, but the underlying trade-off is the same: more time gathers light and erases motion.
If Pro mode is unfamiliar, check what the controls mean on your device before the trip. Samsung's current overview of camera modes describes Pro controls including ISO, shutter speed, exposure, focus and white balance, but availability differs by handset. Do not download an unknown “pro camera” app in the field and assume it can access the same computational pipeline as the built-in camera.
Ordinary Photo mode: use speed while the aurora is strong
Ordinary mode is underrated. When the aurora is bright enough, a phone can make a faster frame with less opportunity for camera shake or subject blur. This is the right first test when you can see folds moving across the sky, when moonlight illuminates the landscape, or when people need to remain recognisable in the foreground.
Frame at 1×, tap near a distant high-contrast edge and take a burst of deliberate single images. If the interface offers an exposure slider, lower it until the brightest green retains texture. Phones often make a night scene look like twilight; a darker exposure can feel more faithful and protect colour channels from clipping.
Do not switch to an ultra-wide lens merely to fit more sky unless you have tested its low-light quality. A wider view can improve composition but may use a smaller or less capable camera. Moving your tripod or using a vertical composition can be a cleaner solution than digital zoom or an untested lens.
Night mode: stabilise, then resist the longest capture
Night mode is most useful when ordinary Photo mode shows only a muddy arc. Secure the phone, enable the timer and begin with the shortest selectable Night option. Review the result at full size, not only as a glowing thumbnail.
Increase capture time in steps until the aurora is visible, then stop. If the curtains become a smooth green cloud, return to a shorter duration. A multi-frame mode can also struggle with tree branches, people, clouds and water moving between frames. Those artefacts are not proof that you held the phone incorrectly; they may be a consequence of the scene changing while the phone aligns and combines images.
Astrophotography mode is not automatically aurora mode. Google's documented Astro workflow is designed for a steady phone and the night sky, often in very dark conditions. A long stack can reveal stars while averaging away fast auroral structure. Use it for a faint, relatively static arc or a separate star-field frame, not by default during a lively display.
Manual or Pro mode: control the compromise
Manual control earns its place when automatic processing makes every frame too bright, too smooth or inconsistent. Set focus to far or infinity, choose the main camera, select raw plus JPEG if the phone offers both, and begin with the relevant matrix row. Aperture is fixed on most phone cameras, so shutter speed and ISO do most of the exposure work.
Take three frames:
the matrix starting exposure;
one frame with half the shutter time and a compensating ISO increase, if available;
one frame with twice the shutter time and a compensating ISO reduction.
This bracket reveals the real choice. The shorter frame may look darker but preserve rays; the longer one may have cleaner noise but erase motion. If all three are soft, inspect stars. Streaked stars suggest movement or an exposure that is too long; sharp stars with a smooth aurora suggest subject motion instead.
White balance is interpretive rather than a measure of exposure. A range around 3,500–4,500 K can be a useful manual starting point for a natural-looking night sky, but moonlight, snow, sodium lamps and the phone's colour response can shift the result. If raw capture is available, preserve a neutral field file and make restrained colour decisions later.
A six-shot field sequence that works under pressure
When the display strengthens, avoid changing five settings at once. Use this repeatable sequence:
Make one ordinary Photo frame. It establishes whether the aurora is already bright enough for speed.
Make the shortest Night frame. Compare structure and foreground detail.
Make one longer Night frame. Keep it only if it adds information without turning curtains into fog.
If Pro mode is available, make the three-frame bracket. Use the closest matrix row.
Reframe once. Add a foreground subject, reflection or human scale rather than producing only empty green sky.
Repeat when the aurora changes. Settings that worked five minutes ago may no longer fit its movement or brightness.
After each sequence, zoom into one bright star, one auroral edge and the brightest foreground highlight. This takes seconds and catches the three common failures: shake, motion blur and clipping.
Diagnose the result before changing equipment
The sky is grey and the green looks fluorescent. The exposure is probably too bright for the scene. Shorten capture time or lower exposure compensation before reducing colour saturation later.
The aurora is bright but has no rays. The shutter or computational capture is too long for its movement. Return to ordinary Photo mode or the shortest Night option.
Stars are short lines. Stabilise the tripod, shield it from wind, use the timer and shorten the exposure. Image stabilisation behaviour on a tripod varies, so follow the device's guidance rather than applying a universal on/off rule.
The foreground is sharp but the sky is soft. Focus may be too near, or the aurora may have moved during the exposure. Use far/infinity focus where offered and compare a shorter frame.
The image is noisy. First ask whether the noise is preferable to motion blur. If the aurora is moving, a somewhat noisy sharp frame often carries more real structure than a clean long exposure. Make several frames and apply modest noise reduction later rather than destroying fine stars and rays in-camera.
Nothing useful appears. The display may simply be below the phone's recording limit, obscured by cloud or overwhelmed by local light. No setting can manufacture a clear aurora from an absent signal. Move away from direct lighting if it is safe, wait for a stronger interval and keep observing.
Edit for memory, not mythology
Begin with exposure and white balance, then recover highlights and add modest contrast. Avoid pushing dehaze, saturation and local contrast until the entire sky becomes textured and electric. The phone may record green or magenta more strongly than your eyes perceived; that is a sensor response, not permission to present every faint arc as an intense storm.
Keep the original file. A raw image gives more latitude, but a computational JPEG may contain cleaner alignment and noise handling. Compare both if the phone saves them. Do not erase a technically imperfect frame that accurately records scale, weather or human experience in favour of a synthetic-looking sky.
If the trip itself is organised around photography, a larger sensor and physical controls may justify carrying another camera. The adjacent decision is covered in this camera phone versus compact camera travel guide. For most travellers, however, the best phone technique is not to imitate a dedicated camera blindly. It is to exploit the phone's speed, stability and processing while recognising when automation has made the scene less truthful.
The setting that actually matters
The decisive setting is the shortest exposure that records the aurora with the structure you want. Start in ordinary Photo mode, move to Night mode only when the signal requires it, and use Manual or Pro mode to control the compromise when automation fails. Stabilise the phone, focus far, bracket exposure and judge rays, stars and highlights after every change.
That method is more reliable than copying a single ISO and shutter speed because it responds to the aurora in front of you. The northern lights do not hold still for a recipe; your settings should not either.
![How to Scan Receipts and Documents with Your Phone [Full Guide]](https://cdn.sanity.io/images/e0gp1l2g/production/0db13feec1d5e72b8a8a5f976d1f3e86619c9228-3840x1860.webp?w=180&h=180&q=78&auto=format&fit=crop)
![How to Scan Receipts and Documents with Your Phone [Full Guide]](https://cdn.sanity.io/images/e0gp1l2g/production/0db13feec1d5e72b8a8a5f976d1f3e86619c9228-3840x1860.webp?w=800&h=450&q=82&auto=format&fit=crop)
![Top 10 Two-Tone Carbon-Fibre Watches for Men [2026 List]](https://cdn.sanity.io/images/e0gp1l2g/production/18870799ba33fab0e038968359cd5772d7d7db30-1024x576.webp?w=800&h=450&q=82&auto=format&fit=crop)
![Top 10 Luxury Watches with Digital Complication Displays for Men [Latest]](https://cdn.sanity.io/images/e0gp1l2g/production/c4f6bf8c080f291c39f7cc85c7344ecff2fd3799-1024x553.webp?w=800&h=450&q=82&auto=format&fit=crop)