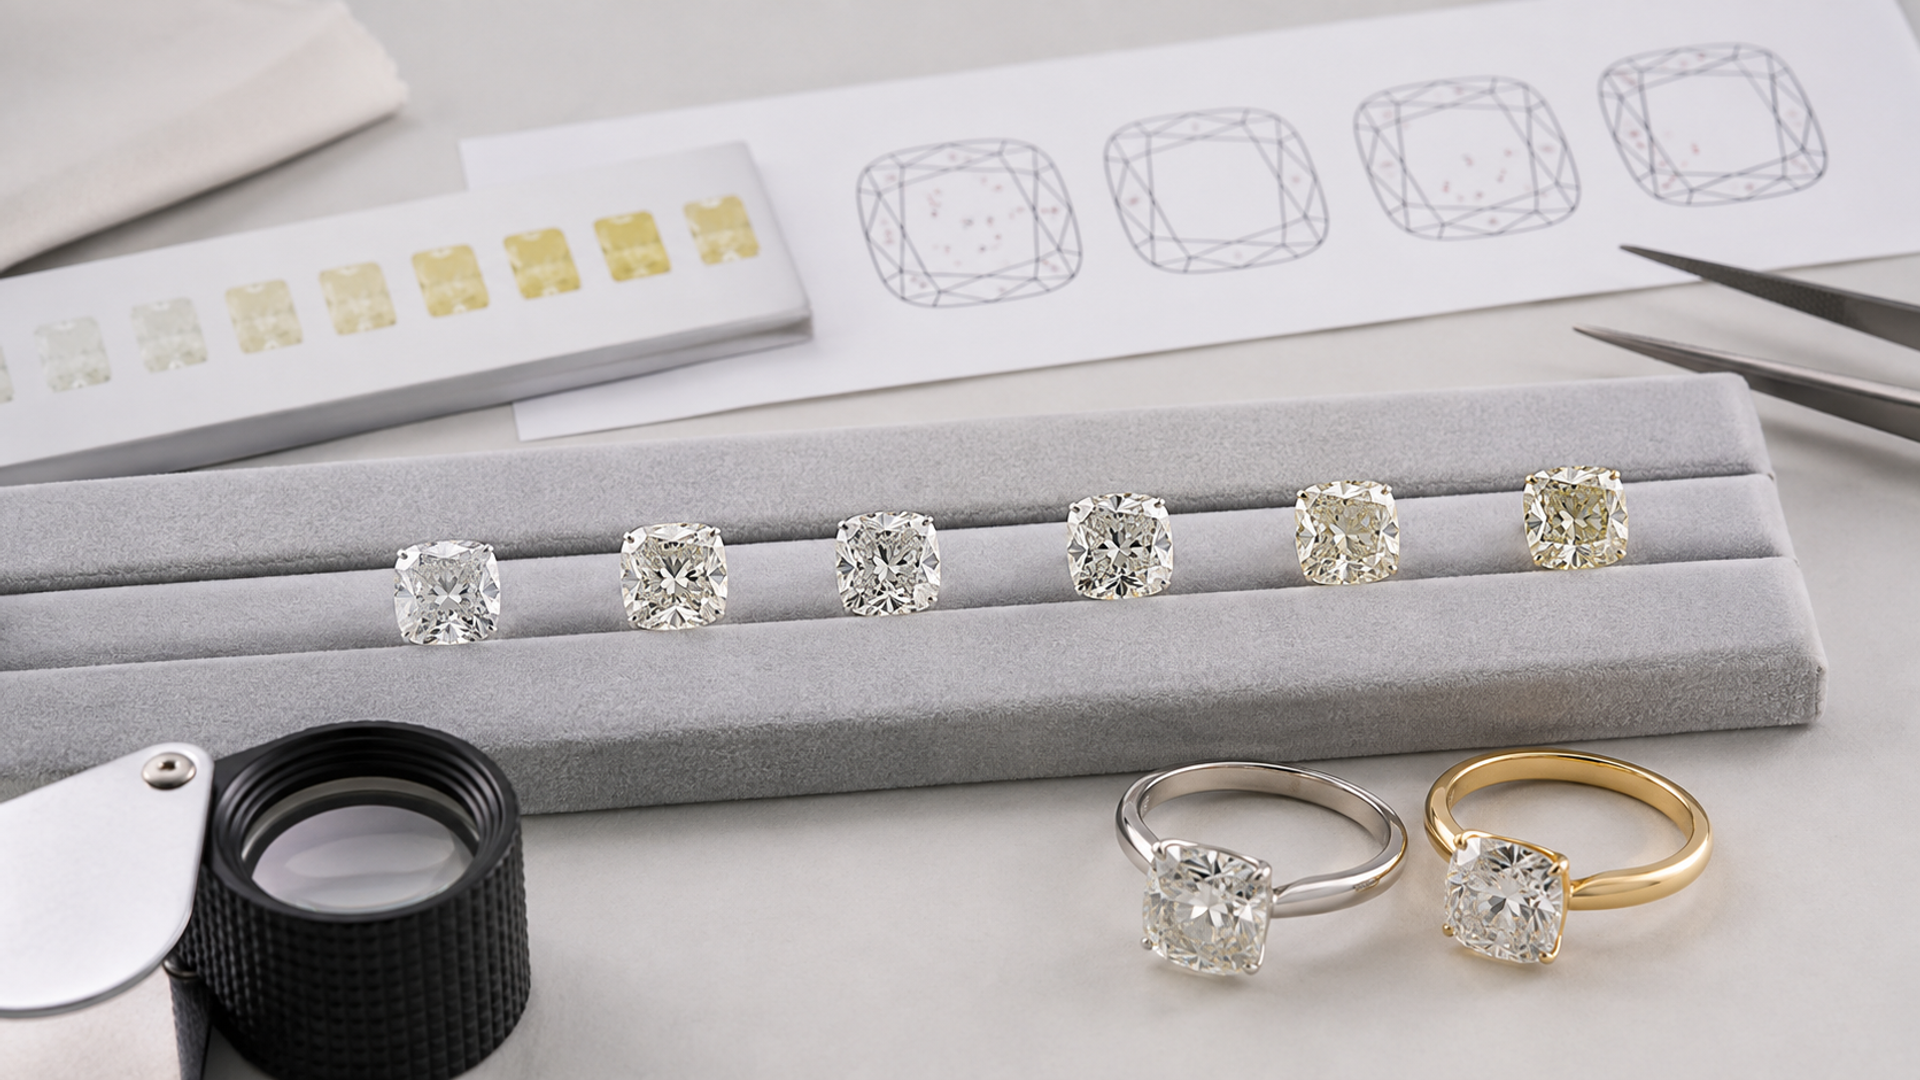
A diamond colour and clarity chart is a language, not a shopping answer. The GIA D-to-Z scale describes body colour under controlled comparison, while the clarity scale describes inclusions and blemishes evaluated under magnification. Neither grade alone predicts how a diamond will look face-up, because cut, shape, size, fluorescence, inclusion position, lighting and setting change the visible result.
The smartest purchase is not automatically the highest colour and clarity combination. It is the point at which additional grade produces little visible benefit for the wearer compared with improvements in cut, proportions or budget left for setting. This guide explains the two scales and provides a budget-allocation matrix without promising that one grade is universally ‘best’.
Direct answer: diamond colour chart and clarity
GIA colour runs from D to Z for the normal colour range; clarity runs from Flawless and Internally Flawless through VVS, VS, SI and Included categories. Use the report to narrow options, then compare stones of the same shape and size in neutral lighting. Prioritise cut and visible performance, avoid problematic inclusion locations, and choose colour in relation to metal, shape and personal sensitivity.
| Decision factor | Evidence to collect | Why it changes the answer | Control before purchase |
|---|---|---|---|
| Colour grade | D-to-Z records increasing visible tint under standard comparison | adjacent grades can look similar once set | compare several grades in the intended metal |
| Clarity grade | size, nature, number, position and relief of features affect grade | two stones with the same grade can present differently | inspect plot and stone at 10x and unaided |
| Cut quality | proportions and finish control light return | high colour cannot rescue weak optical performance | prioritise cut evidence for the chosen shape |
| Shape and size | faceting and carat alter colour retention and inclusion visibility | rules of thumb do not transfer perfectly | compare like shape and face-up size |
| Setting metal | white and warm metals frame body colour differently | the setting can reduce or emphasise tint | view loose and against the intended metal |
| Report scope | a grading report identifies measured characteristics, not beauty or price | buyers can outsource judgement too far | match the report number and inspect the actual stone |
This matrix is the article-specific value object for diamond colour chart and clarity. It prevents a famous name, a single specification or one price from silently becoming the recommendation.
Current evidence baseline
Evidence 1. GIA's D-to-Z colour scale starts at colourless D and continues to light yellow or brown Z under controlled comparison. Source.
Evidence 2. GIA's clarity scale contains 11 grades and considers the size, number, position, nature and relief of clarity characteristics. Source.
Evidence 3. GIA describes cut, colour, clarity and carat weight as separate quality factors that interact in diamond assessment. Source.
Evidence 4. GIA's consumer buyer guide explains how to use a grading report while evaluating the actual diamond. Source.
For diamond colour chart and clarity, these sources support only the stated claims. They do not prove permanent availability, universal authenticity, future appreciation or suitability for every owner.
How the decision factors change the result
Colour grade. The evidence to collect is that d-to-Z records increasing visible tint under standard comparison. That changes the decision because adjacent grades can look similar once set. The practical control is to compare several grades in the intended metal. For this colour grade test within diamond colour chart and clarity, record the date, exact object, source and assumption that would reverse the conclusion. If evidence remains unavailable, label the factor unknown rather than converting it into a favourable score.
Clarity grade. The evidence to collect is that size, nature, number, position and relief of features affect grade. That changes the decision because two stones with the same grade can present differently. The practical control is to inspect plot and stone at 10x and unaided. For this clarity grade test within diamond colour chart and clarity, record the date, exact object, source and assumption that would reverse the conclusion. If evidence remains unavailable, label the factor unknown rather than converting it into a favourable score.
Cut quality. The evidence to collect is that proportions and finish control light return. That changes the decision because high colour cannot rescue weak optical performance. The practical control is to prioritise cut evidence for the chosen shape. For this cut quality test within diamond colour chart and clarity, record the date, exact object, source and assumption that would reverse the conclusion. If evidence remains unavailable, label the factor unknown rather than converting it into a favourable score.
Shape and size. The evidence to collect is that faceting and carat alter colour retention and inclusion visibility. That changes the decision because rules of thumb do not transfer perfectly. The practical control is to compare like shape and face-up size. For this shape and size test within diamond colour chart and clarity, record the date, exact object, source and assumption that would reverse the conclusion. If evidence remains unavailable, label the factor unknown rather than converting it into a favourable score.
Setting metal. The evidence to collect is that white and warm metals frame body colour differently. That changes the decision because the setting can reduce or emphasise tint. The practical control is to view loose and against the intended metal. For this setting metal test within diamond colour chart and clarity, record the date, exact object, source and assumption that would reverse the conclusion. If evidence remains unavailable, label the factor unknown rather than converting it into a favourable score.
Report scope. The evidence to collect is that a grading report identifies measured characteristics, not beauty or price. That changes the decision because buyers can outsource judgement too far. The practical control is to match the report number and inspect the actual stone. For this report scope test within diamond colour chart and clarity, record the date, exact object, source and assumption that would reverse the conclusion. If evidence remains unavailable, label the factor unknown rather than converting it into a favourable score.
Worked decision scenario
Set an all-in diamond and setting budget. Compare at least four stones of the same shape and similar face-up size: two colour grades and two clarity grades around the target. Record cut data, fluorescence, inclusion location, report, price and unaided appearance under neutral, warm and daylight-like lighting. Calculate the price step between adjacent grades and write what visible improvement it bought. Allocate money to the step with the clearest observed benefit, not the most prestigious letters.
How to read the colour scale
D is the top of GIA’s normal colour range, followed by E and F, then near-colourless grades G through J. The scale continues towards more noticeable yellow, brown or grey tint. Grading is performed by comparison under controlled conditions, not by viewing a mounted diamond across a room. Adjacent grades are narrow. Shape, size and setting can make their visible impact different, so use the grade as a calibrated description rather than a beauty ranking.
How to read the clarity scale
Flawless and Internally Flawless sit above VVS1 and VVS2, VS1 and VS2, SI1 and SI2, and Included grades. The grade reflects more than a count. Position, size, nature, number and visual relief matter. A dark inclusion under the table can affect appearance differently from a light feature near the edge. Review the plot and comments, then inspect the stone at 10x and without magnification.
Why cut usually deserves protection
Cut controls how a faceted diamond returns light and can dominate face-up beauty. For round brilliants, GIA provides a cut grade; fancy shapes require broader proportion and optical assessment. Do not sacrifice a strong-performing cut merely to move one colour or clarity grade if the improvement is not visible. Compare videos and the stones themselves, and check symmetry, polish and outline as part of the complete decision.
Setting and shape change the answer
Yellow or rose gold can make a slightly warmer diamond feel coherent, while white metal may make tint easier to notice to a colour-sensitive buyer. Emerald and Asscher cuts can reveal inclusions and body colour differently from brilliant cuts. Larger stones can show characteristics more readily. Match advice to shape, carat, setting and wearer. A universal chart recommendation without these details is incomplete.
Use the report without worshipping it
Verify the report number through the issuing laboratory and match measurements and inscription where applicable. A report does not price the stone, guarantee future value or assess the final setting. Ask whether treatments, fluorescence or comments need explanation. Compare the actual diamond under several lights and allow a return or inspection period. The report makes attributes legible; the buyer still decides whether the visual result justifies the cost.
Evidence checklist
[ ] Verify GIA report
[ ] Compare same shape and size
[ ] Protect cut quality
[ ] Inspect inclusion position
[ ] View multiple lighting conditions
[ ] Test against setting metal
[ ] Price adjacent grade steps
[ ] Retain inspection or return route
Unchecked fields for diamond colour chart and clarity remain unknown. They should never become favourable assumptions merely to complete this decision.
Reader-visible sources and method
The external pages above were checked for this diamond colour chart and clarity publication. Price, availability, service, tax, regulation and platform terms must be reconfirmed for the buyer's market and date. Ranking pages informed a separate SERP benchmark; their wording and paragraph order were not copied.
Continue with adjacent VERTU editorial research
For diamond colour chart and clarity, these links provide adjacent premium-lifestyle and decision context. They do not replace specialist or official evidence for the decision.
Final judgement
GIA colour runs from D to Z for the normal colour range; clarity runs from Flawless and Internally Flawless through VVS, VS, SI and Included categories. Use the report to narrow options, then compare stones of the same shape and size in neutral lighting. Prioritise cut and visible performance, avoid problematic inclusion locations, and choose colour in relation to metal, shape and personal sensitivity.
The useful standard for diamond colour chart and clarity is not certainty created by confident language. It is a decision whose evidence, downside and next review point are visible to the reader.