| Feature | Capability | Why It Matters for Comics |
|---|---|---|
| Facial Consistency | Maintains exact face across unlimited images | Characters look the same in every panel |
| Multi-Image Context | Up to 14 reference images | Create consistent settings, props, and characters |
| Text Rendering | Perfect typography in multiple languages | Speech bubbles, sound effects, titles |
| "Thinking" Mode | Reasons through complex prompts | Understands story logic and scene composition |
| Search Grounding | Connects to Google Search | Factually accurate backgrounds and settings |
| Style Control | Precise aesthetic control | Manga, Western comics, graphic novels, any style |

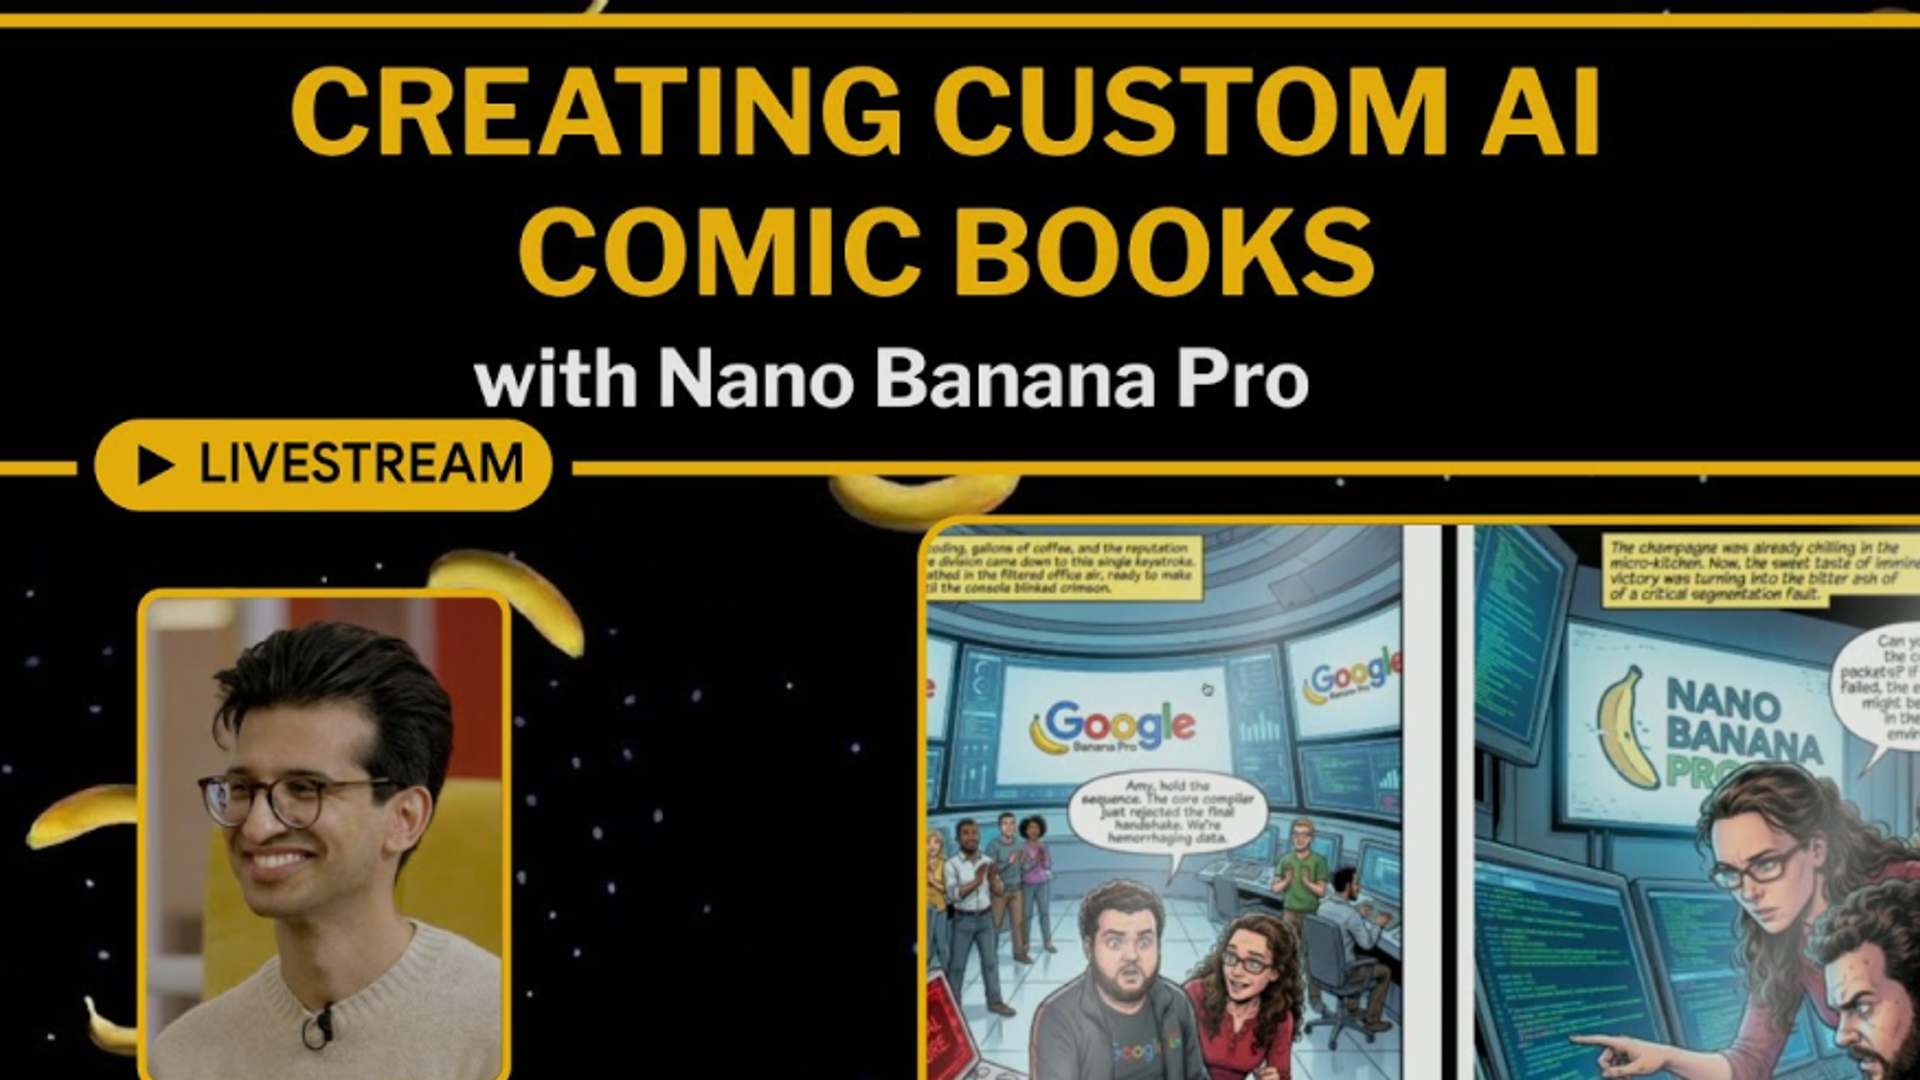
The Future of Personal Content Creation Has Arrived
Imagine generating your own comic books, complete with consistent characters across every panel. Picture creating movie-style posters with yourself as the protagonist, or crafting an entire visual novel where you control every scene. This isn't science fiction anymore—it's happening right now with Google's Nano Banana Pro, and the barrier to entry is simply learning how to write the right prompt.
The viral #NanoBanana trend has generated over 200 million images since August 2025, with over 1 billion views on X (formerly Twitter) alone. What started as a fun way to turn selfies into action figures has evolved into something far more powerful: a tool for creating sequential art, consistent character designs, and personalized visual storytelling.
The dream of creating your own comics is no longer a dream—it just requires mastering the art of prompt engineering.
What Makes Nano Banana Pro Revolutionary?
The Technical Breakthrough
Nano Banana Pro, built on Google's Gemini 3 Pro Image model, represents a quantum leap in AI image generation:
Why "Nano Banana"?
The quirky name comes from:
- Nano : Lightweight, efficient model
- Banana : Google's internal codename (yes, really)
But don't let the playful name fool you—this is professional-grade technology that's transforming content creation.
The Comic Creation Workflow: From Concept to Panel
Step 1: Master the Night Flash Photo Aesthetic
One of the most viral Nano Banana trends is the "2000s night flash photo" style—perfect for creating raw, authentic-looking comic panels.
The Viral Night Flash Prompt Structure:
Use facial features from attached photo. A close-up shot of [character description] displayed on the screen of a compact Canon digital camera. The camera body surrounds the image with its buttons, dials, and textured surface visible, including the FUNC/SET wheel, DISP button, and the "IMAGE STABILIZER" label along the side. The photo on the screen shows [character] [location/action], illuminated by a bright built-in flash that creates sharp highlights on their face and hair. [Physical details]. The flash accentuates features against a [background description] softly blurred. The mood is candid, raw, nostalgic, reminiscent of early 2000s digital camera snapshots. Colors are slightly muted with cool undertones, strong flash contrast, and natural grain from the display. Technical specs: - No text, no logos inside the photo preview - Scale ratio: 4:5 vertical - Camera: compact digital camera simulation - Lens: equivalent to 28-35mm - Aperture: f/2.8 - ISO: 400 - Shutter speed: 1/60 with flash - White balance: auto flash - Lighting: harsh direct flash on subject, ambient low light in background - Color grading: nostalgic digital-camera tones, high contrast flash, subtle display grain
Why This Works for Comics:
- Creates consistent "documentary" style
- Adds authenticity and emotional weight
- Perfect for noir, mystery, or urban settings
- Easily adaptable for different scenes
Step 2: Create Character References
The key to comic creation is character consistency. Here's the workflow:
Initial Character Setup Prompt:
Create a 1/7 scale commercialized figurine of the character in the attached picture, in a realistic style. The figurine is placed on a computer desk with proper lighting. The figurine has a round transparent acrylic base, with no text on the base. Display high detail in clothing, facial features, and pose. Studio photography lighting, 4K resolution, professional product shot.
Why Start With a Figurine?
- Establishes 360-degree character design
- Shows character from multiple angles
- Creates a "model sheet" reference
- Easier to maintain consistency across poses
Step 3: Generate Sequential Panels
Once you have your character references, create story panels:
Panel Prompt Template:
Using the attached character reference images (maintain exact facial features and proportions), create [panel description]: Subject: [Character name] [action/pose] Location: [Setting details] Composition: [Camera angle - low angle/bird's eye/over shoulder/etc.] Lighting: [Type and direction of light] Mood: [Emotional tone] Style: [Comic style - manga/American comic/graphic novel/etc.] Frame: [Panel shape - widescreen/square/vertical/etc.] Technical requirements: - Maintain character consistency from reference images - [Specific colors/atmosphere] - [Any props or background elements] - [Facial expression details]
Step 4: The Movie Poster Technique
Create dramatic key art for your comic covers or chapter breaks:
Movie Poster Prompt:
Create a cinematic movie poster featuring [character from reference photo]. Title: "[Your Comic Title]" in [font style - bold serif/handwritten/grunge/etc.] at top Tagline: "[Your tagline]" in smaller text Visual composition: - [Character] in [dramatic pose/action] - [Lighting style - backlit/dramatic shadows/golden hour/etc.] - [Background elements] - [Color palette - noir blacks/vibrant colors/desaturated/etc.] Bottom elements: - Billing credits (use placeholder text) - Release date - Small logos/symbols [describe if any] Style: [Film genre - action thriller/horror/drama/sci-fi] Resolution: High quality print-ready, aspect ratio 27:40 (standard movie poster)
Advanced Techniques: Multi-Character Stories
Creating Character Interactions
The "Hug Yourself" Technique (Viral Prompt Adapted):
Take a photo with a Polaroid camera aesthetic. The photo should look like an ordinary photograph with slight blur and consistent flash lighting scattered throughout. Show two versions of the same character (use attached reference photo for both): - Version 1: [Character] at present day, wearing [outfit] - Version 2: [Character] from [time period], wearing [outfit] They are [action - hugging/talking/facing off/etc.] in [location]. Maintain exact facial consistency for both versions. Change only [specific elements]. Background: [setting description] Mood: [emotional tone] Lighting: Soft Polaroid flash, slightly overexposed, warm tones
Why This Works:
- Creates time-travel narratives
- Shows character evolution
- Enables "alternate universe" stories
- Perfect for flashback sequences
The Style Fusion Approach
Nano Banana Pro excels at blending different art styles within a consistent narrative:
Style-Shifting Prompt:
Create a comic panel transitioning between two art styles: Left side (50% of frame): - Style: Photorealistic, detailed shadows, cinematic lighting - Character [from reference] in realistic setting - Colors: Muted, natural palette Right side (50% of frame): - Style: [Anime/Manga/Watercolor/etc.] - Same character, same pose, stylized interpretation - Colors: [Vibrant/Pastel/Bold/etc.] The transition should be seamless in the center, showing the transformation. Subject maintains facial consistency across both styles.
Real-World Comic Creation Examples
Example 1: Urban Mystery Series
Character Sheet Prompt:
Create a noir detective character design sheet. Using attached reference photo, show the same character in 4 poses: 1. Full body standing, trench coat, fedora, moody lighting 2. Close-up face shot, dramatic shadows, cigarette smoke 3. Action pose running, coat flowing, rain effect 4. Back view walking into fog, silhouette with rim lighting Style: 1940s film noir aesthetic, high contrast black and white, dramatic shadows Maintain exact facial features across all poses. Aspect ratio 16:9 panoramic layout.
Panel Sequence:
Page 1, Panel 1 (establishing shot): Wide angle view of rain-soaked city street at night. Neon signs reflect in puddles. [Character from reference] walks toward camera, backlit by streetlights creating silhouette. Film noir style, high contrast, desaturated colors. Page 1, Panel 2 (medium shot): [Character] stops under flickering neon sign. Close-up on face, rain dripping from fedora. Flash photography style lighting from left creates dramatic half-shadow. Expression: determined, suspicious. Background: blurred wet brick wall. Page 1, Panel 3 (detail shot): Extreme close-up of [character's] eyes, narrowed in concentration. Reflected in eyes: distorted image of mysterious figure in doorway. Dramatic lighting emphasizes eye detail. Style consistency: Film noir, 1940s aesthetic, grainy texture, heavy shadows
Example 2: Fantasy Adventure Comic
Character Reference Prompt:
Create a fantasy warrior character wearing elaborate armor. Using attached photo for facial reference, show the character: Armor design: Intricate golden plate armor with blue gemstone accents, flowing cape Weapon: Ornate longsword with glowing runes Setting: Standing on mountain peak at sunset, epic landscape background Pose: Heroic stance, sword pointed skyward Lighting: Golden hour backlighting, dramatic sky, lens flare Style: High fantasy illustration, painted aesthetic, detailed textures Resolution: 4K, vertical composition perfect for character design sheet
Action Sequence:
Create 3-panel action sequence using character from reference: Panel 1 (top third): Low angle shot looking up at [character] mid-leap, sword raised high, cape flowing. Sky background with storm clouds. Dynamic motion blur on cape edges. Panel 2 (middle third): Impact moment - [character] landing, sword striking ground, energy burst radiating outward. Debris flying. Close-up on determined facial expression. High contrast lighting. Panel 3 (bottom third): Wide shot aftermath - [character] standing in crater, sword glowing, dust settling. Defeated enemies scattered around. Dramatic silhouette against sunset sky. Style: Manga/anime inspired action, dynamic speed lines, high impact visuals Maintain character design consistency across all panels
Example 3: Slice-of-Life Comedy
Everyday Scenarios Prompt:
Create a 4-koma (4-panel) comic strip layout using character from reference photo: Panel 1: [Character] sitting at coffee shop, peaceful expression, coffee cup in hand. Warm morning lighting, cozy interior. Speech bubble: "Finally, a quiet morning..." Panel 2: Same setting, [character] looking startled as phone buzzes loudly on table. Coffee spills slightly. Expression: surprised shock. Sound effect: "BZZZZZT!" Panel 3: Close-up of [character's] face reading phone screen, expression changes from shock to horror. Lighting darkens, dramatic shadows appear. Background becomes monochrome. Panel 4: Wide shot - [character] frantically running out of coffee shop, coat half-on, coffee cup still in hand. Other patrons looking confused. Motion lines indicate speed. Style: Manga-style comedy, exaggerated expressions, clean line art, simple backgrounds Maintain facial consistency throughout all panels Aspect ratio: Vertical 4-panel layout
Prompt Engineering: The Real Skill
The Anatomy of a Perfect Comic Prompt
Essential Elements:
- Reference Specification "Using attached photo for facial reference"
- "Maintain exact facial features from reference"
- "Character consistency with uploaded image"
- Subject Description Who: Character name/role
- What: Action/pose
- Wearing: Detailed outfit description
- Holding: Props/objects
- Environmental Context Location: Specific setting
- Time: Day/night/era
- Weather: Conditions affecting scene
- Background elements: Detailed descriptions
- Composition Details Camera angle: Low/high/eye-level/Dutch angle
- Distance: Close-up/medium/wide/extreme close-up
- Framing: Rule of thirds/centered/off-center
- Aspect ratio: Panel dimensions
- Lighting Specifications Source: Natural/artificial/mixed
- Direction: Front/side/back/top
- Quality: Harsh/soft/diffused
- Color: Warm/cool/neutral
- Style Definition Art style: Manga/Western comic/watercolor/etc.
- Era: Modern/vintage/retro
- Aesthetic: Realistic/stylized/abstract
- Genre: Noir/superhero/slice-of-life
- Technical Requirements Resolution: 4K/print-ready
- Format: Vertical/horizontal/square
- Special effects: Motion blur/lens flare/etc.
Common Mistakes to Avoid
❌ Over-Prompting
"4K, ultra detailed, masterpiece, trending on artstation, award-winning, photorealistic, hyperrealistic, amazing, stunning..."
✅ Natural Language
"Create a detailed manga-style panel showing [character] in [action]. Use dramatic lighting and maintain character consistency with reference photo."
❌ Vague Instructions
"Make it look cool" "Add some effects" "Make the background interesting"
✅ Specific Details
"Add speed lines radiating from center" "Include neon signs with Japanese text in background" "Use rim lighting from behind to create dramatic silhouette"
❌ Ignoring Continuity
Each panel prompted separately without reference to previous panels
✅ Maintaining Consistency
"Continue from previous panel, same character (ref image), same location, next moment in sequence..."
Creating Different Comic Styles
Western Superhero Comics
Style Characteristics:
- Bold outlines
- Dynamic poses
- Primary color palette
- Action-focused
- Muscular anatomy
Example Prompt:
Create a superhero comic book panel in classic American comic style: Character: [From reference photo] wearing superhero costume: - Colors: Blue and red primary costume - Cape: Flowing red cape with gold trim - Symbol: [Design] on chest - Mask: Half-face mask maintaining facial recognition Action: Flying through city skyline, fist extended forward, cape billowing Background: Skyscrapers, blue sky, dynamic perspective lines Lighting: Bright heroic lighting, slight lens flare on fist Style: Bold ink lines, Ben-Day dots shading, vibrant primary colors Effects: Speed lines, motion blur on cape Panel border: Classic thick black border Aspect ratio: Widescreen comic panel
Japanese Manga Style
Style Characteristics:
- Clean line art
- Screen tone effects
- Large expressive eyes
- Speed lines
- Minimal backgrounds
Example Prompt:
Create a manga-style panel using character from reference photo: Character: [Character name] with manga-style features while maintaining recognizable facial characteristics from reference photo Expression: [Determined/shocked/happy/etc.] Pose: [Specific manga-typical pose] Background: [Simple or detailed depending on focus] Effects: - Screen tone gradient for shading - Speed lines emanating from [direction] - Impact stars/flowers for [emotion] - [Sound effect] written in stylized katakana Style: Black and white manga aesthetic, clean line art, high contrast Panel: Right-to-left reading orientation Aspect ratio: Standard manga page proportion
Graphic Novel Realism
Style Characteristics:
- Detailed realistic art
- Mature themes
- Complex shading
- Muted color palette
- Atmospheric depth
Example Prompt:
Create a graphic novel panel with photorealistic style: Character: [From reference], age and features maintained exactly Expression: [Subtle, nuanced emotion] Clothing: [Detailed realistic outfit with fabric textures] Action: [Grounded, believable movement] Environment: - Location: [Detailed real-world setting] - Weather: [Atmospheric conditions] - Time: [Specific time of day with accurate lighting] - Details: [Environmental storytelling elements] Art style: Painted digital art, realistic proportions, complex lighting Color palette: [Desaturated/earthy/cool-toned/etc.] Mood: [Contemplative/tense/melancholic/etc.] Technical: High detail level, print-quality resolution, cinematic composition
The Multi-Panel Story Technique
Creating Visual Continuity
Establishing Shot + Close-ups Pattern:
Panel 1 (Establishing):
Wide angle establishing shot of [location]. [Character from reference] visible in mid-distance. Time: [time of day]. Weather: [conditions]. Mood: [atmospheric quality]. Show full environment for context. Aspect ratio: Wide cinematic 21:9.
Panel 2 (Medium Shot):
Medium shot of same character from establishing shot, maintaining exact appearance. [Action/interaction]. Camera angle: [specification]. Lighting continues from previous panel. Background: Relevant elements from establishing shot now closer. Aspect ratio: Standard 16:9.
Panel 3 (Close-up):
Close-up on [character's] face, maintaining facial consistency from previous panels. Expression: [Emotion]. Lighting: Same source as previous panels, now highlighting facial features. Background: Heavily blurred elements from scene. Focus on emotion. Aspect ratio: Portrait 4:5.
Panel 4 (Reaction/Impact):
[Describe climactic moment]. Return to [wide/medium] shot showing [result of action]. Character maintains consistency. Environment shows [change/impact]. Lighting: [Dramatic shift if appropriate]. Aspect ratio: [As needed for impact].
Advanced: Movie-Style Storyboarding
Creating a Complete Storyboard
Scene Heading Prompt:
Create a storyboard-style title card: Text: "SCENE 12 - THE CONFRONTATION" Visual: Sketchy black and white drawing showing key elements of scene - Location: [Setting] - Characters: Rough silhouettes of [character from reference] and [opponent] - Key props: [Important objects] - Camera angles indicated with arrows Style: Professional storyboard aesthetic, rough pencil sketch, annotations Layout: Landscape format with text overlay
Storyboard Panel Series:
Create storyboard-style panels for action sequence: Format: 3x3 grid of storyboard frames, hand-drawn sketch aesthetic Frame 1: [Shot type] - [Action description] Camera: [Angle] Movement: [Pan/zoom/static] Frame 2: [Shot type] - [Next action] Camera: [Angle] Movement: [Direction] [Continue for all 9 frames] Maintain character from reference photo recognizable even in sketch form Include camera movement arrows Add frame numbers Technical notes in margins Professional storyboard presentation
Creating Character Emotions Chart
For consistent emotional portrayal:
Create a character emotion reference sheet using [character from reference photo]: Layout: 3x3 grid showing same character with different expressions Row 1 (Positive): - Happy: Genuine smile, eyes crinkled - Excited: Wide eyes, open mouth, energetic - Content: Soft smile, relaxed features Row 2 (Neutral): - Neutral: Resting face, no strong emotion - Focused: Intense gaze, slight frown - Curious: Raised eyebrow, head tilted Row 3 (Negative): - Angry: Furrowed brow, clenched jaw - Sad: Downcast eyes, slight frown - Fearful: Wide eyes, tense expression Style: [Your chosen art style] Lighting: Even, clear view of all expressions Background: Simple neutral color Maintain exact facial structure across all expressions Resolution: High detail for reference use
The Comic Book Cover Technique
Professional Cover Prompt:
Create a professional comic book cover: Title: "[Your Title]" - Font: [Bold/serif/handwritten/grunge] - Placement: Top third, slightly curved or dynamic - Color: [Color choice that contrasts with background] - Effects: [Glow/shadow/3D/etc.] Main Image: - Character: [From reference photo] in [heroic pose/dramatic moment] - Composition: [Rule of thirds/centered/dynamic angle] - Background: [Setting/abstract/gradient] - Lighting: [Dramatic/mysterious/bright] Bottom Information: - Issue number (large) - Creative team credits - Publisher logo - Barcode area - Price Style: [Specific comic era - Golden Age/Modern/etc.] Quality: Print-ready, CMYK color mode, high resolution Aspect ratio: Standard comic book cover proportions
Building Your Comic Series
Workflow for Consistent Series
1. Create Bible Document
Before generating images, write:
- Character descriptions (physical details, clothing, personality)
- Setting descriptions (locations, time period, atmosphere)
- Color palette for each location/character
- Lighting conditions for different scenes
- Style references (art style, era, influences)
2. Generate Master References
Create comprehensive character reference sheet for [Character Name]: Image grid layout showing: - Front view, full body - Side profile, full body - Back view, full body - Close-up face (front) - Close-up face (3/4 view) - Hands reference (various poses) - Expression variations Character details: - Height: [Specification] - Build: [Body type] - Hair: [Color, style, length] - Clothing: [Default outfit details] - Accessories: [Always-present items] Style: Clean reference sheet style, white background, even lighting, clear labels Use attached photo as facial reference Resolution: Ultra-high detail for future reference
3. Location Establishing Shots
Create location reference establishing shot: Location: [Name/description] View: [Wide establishing angle] Time: [Specific time of day] Season: [Season with appropriate details] Weather: [Conditions] Key elements: - [Important building/landmark] - [Distinctive features] - [Props/objects that appear regularly] Style: [Matches your comic style] Lighting: [Consistent with time/weather] Details: High clarity for future reference panels Save as master reference for this location
Maintaining Continuity Across Issues
Panel-to-Panel Consistency Technique:
Using attached reference images: - Character reference: [File name] - Location reference: [File name] - Previous panel: [File name] Create next panel in sequence: - Same character, same location - [Time passed]: [Immediate/5 minutes/etc.] - Action continues: [Describe next beat] - Camera: [New angle/same angle] - Lighting: [Consistent with previous/changed because of time] - Character costume: [Same as previous panel/minor changes] Ensure seamless visual continuity with uploaded reference panels
The Comic Script to Image Workflow
From Script to Visual
Script Format:
PAGE 1 PANEL 1 Description: Wide shot of dark warehouse interior. HERO enters through broken door, light shaft from outside illuminating dust particles. Dialogue: HERO - "I know you're in here." PANEL 2 Description: Medium shot of HERO, wary expression, hand on holstered weapon. Dialogue: HERO - "We can do this the easy way..." PANEL 3 Description: Extreme close-up on HERO's eyes, reflecting off-panel light source. Sound effect: CRACK PANEL 4 Description: Wide dramatic shot, VILLAIN revealed in shadows, backlit. Dialogue: VILLAIN - "Or we can do it MY way."
Converting to Image Prompts:
Page 1, Panel 1:
Comic panel: Wide establishing shot Setting: Abandoned warehouse interior - High ceilings with exposed beams - Broken windows allow dust-particle-filled light shafts - Industrial debris scattered on floor - Atmospheric fog/dust Character: [Hero from reference photo] entering through broken door in background - Position: Mid-distance, silhouetted against doorway light - Pose: Cautious, one hand near weapon - Costume: [Specific details] Lighting: Strong directional light from doorway, creating dramatic contrast with dark interior. Volumetric light rays through dust. Style: [Your comic style] Mood: Tense, atmospheric, noir-influenced Aspect ratio: Widescreen panel, 16:9
Page 1, Panel 2:
Comic panel: Medium shot continuing from previous panel Character: [Hero from reference] now in warehouse interior - Distance: Medium shot, chest-up - Expression: Wary, alert, slight frown - Eyes: Scanning environment - Hand: Resting on holstered weapon at hip - Costume: Same as previous panel, maintaining continuity Lighting: Side lighting from warehouse windows, creating dramatic shadows on face Background: Blurred warehouse elements from previous panel Camera angle: Slightly low angle, making character appear confident/powerful Style: [Same as previous panel] Maintain character consistency with reference photo Aspect ratio: Standard vertical panel, 4:5
Pro Tips for Viral Comic Content
What Makes Comics Go Viral
- Relatable Emotions Exaggerated expressions everyone understands
- Universal situations presented uniquely
- Cultural references done right
- Visual Hooks Dramatic contrast (light/dark, color/monochrome)
- Unexpected style shifts
- Clever visual metaphors
- Shareable Format Square format for Instagram
- Vertical scrolling for mobile
- Easily screenshot-able key moments
Optimization Prompts for Social Media
Instagram Square Format:
Create a comic panel optimized for Instagram: Format: Perfect square, 1080x1080 pixels Composition: Centered, important elements in safe zone (avoiding edges) Style: High contrast, bold colors that pop on mobile screens Text: Large, legible at small sizes Negative space: Enough breathing room around subject [Your scene description maintaining character from reference photo] Ensure visual reads clearly at thumbnail size
Vertical Mobile Scroll:
Create a webtoon-style vertical comic panel: Format: Ultra-tall vertical, 800x2000 pixels Composition: Designed for top-to-bottom scrolling Key action: Positioned at optimal scroll reveal points Text placement: Integrated naturally in vertical flow [Your scene description] Optimized for mobile reading, thumb-scrolling pacing
Building Your Own Comic Universe
Creating Multiple Characters
The Character Interaction Prompt:
Create a two-character interaction scene: Character A: [From reference photo 1] - Position: [Left/right] - Pose: [Specific pose] - Expression: [Emotion] - Looking at: [Character B/away/camera] Character B: [From reference photo 2] - Position: [Left/right] - Pose: [Specific pose] - Expression: [Emotion] - Looking at: [Character A/away/camera] Interaction: [Describe relationship dynamic visually] Background: [Setting] Lighting: [Must work for both characters] Style: [Your comic style] Maintain facial consistency for both characters from reference photos Show relationship dynamic through body language and positioning
World-Building Through Visuals
Location Consistency:
Create a recurring location in my comic universe: Location Name: [Name] Type: [Cafe/hideout/headquarters/etc.] Distinctive Features: - [Unique element 1] - [Unique element 2] - [Unique element 3] View: [Angle that shows key features] Time: [Usual time when scenes occur here] Atmosphere: [Mood/tone of location] Details that appear in every panel at this location: - [Consistent element 1] - [Consistent element 2] Style: [Your comic style] Purpose: Create recognizable recurring location for my comic series Generate in high detail for future reference
The Future: AI-Animated Comics
Motion Comic Technique
While Nano Banana Pro generates static images, you can create the illusion of motion:
Multi-Phase Action Prompt:
Create a 4-image motion sequence showing one fluid action: Base setup: - Character: [From reference photo] - Action: [Specific movement - punch/jump/run/etc.] - Background: [Consistent setting] - Camera: [Fixed position] Image 1: Pre-action (anticipation) - Character position: [Starting pose] - Energy: Coiled, ready - Timing: Frame 1 of 4 Image 2: Beginning motion - Character position: [Early movement] - Motion blur: Starting on moving elements - Timing: Frame 2 of 4 Image 3: Peak action - Character position: [Maximum extension] - Motion blur: Strong on fastest-moving parts - Impact effects: [If applicable] - Timing: Frame 3 of 4 Image 4: Follow-through - Character position: [Completing movement] - Motion blur: Dissipating - Settling effects: [Dust/debris/etc.] - Timing: Frame 4 of 4 Style: [Your comic style with animation influence] Maintain character consistency across all 4 frames Generate as sequential images for animation or motion comic use
Advanced Prompt Library
Cinematic Techniques in Comics
Dutch Angle for Tension:
Create a comic panel using Dutch angle (tilted camera) technique: Character: [From reference photo], maintaining exact appearance Camera: 15-degree counterclockwise tilt Composition: Off-center, creating unease [Rest of scene description] Purpose: Create psychological tension and disorientation Style: [Your style with cinematic influences]
Worm's Eye View for Power:
Create a comic panel from extreme low angle: Camera: Positioned at ground level looking up Character: [From reference photo] standing above camera Effect: Character appears powerful, imposing, dominant Background: Sky visible, perspective lines converge upward [Rest of scene description] Purpose: Establish character dominance or threat level
Bird's Eye View for Vulnerability:
Create a comic panel from high overhead angle: Camera: Directly above, looking down Character: [From reference photo] small in frame Effect: Character appears vulnerable, isolated, or contemplative Background: [Floor/ground pattern visible around character] [Rest of scene description] Purpose: Show vulnerability or establish spatial relationships
Special Effects Integration
Energy Effects:
Character: [From reference photo] generating energy effect Effect visualization: - Type: [Lightning/fire/magic/etc.] - Color: [Specific color palette] - Origin: [From hands/eyes/body/etc.] - Intensity: [Subtle glow/explosive burst/etc.] - Illumination: Effect lights character's face from [direction] Background reaction: Environment illuminated by energy effect Style: [Your comic style + effect aesthetic] Maintain character facial features while adding dramatic lighting from effect
Speed/Motion Effects:
Character: [From reference photo] moving at high speed Motion effects: - Speed lines: [Direction and intensity] - Motion blur: [On which body parts] - Multiple ghosted images: [How many, spacing] - Background: Stretched/blurred in opposite direction of movement Style: [Manga-style speed lines/western comic motion blur/etc.] Action: [Specific movement] Maintain character recognizable despite motion effects
Troubleshooting Common Issues
Problem: Character Looks Different Each Panel
Solution:
CRITICAL: Use these EXACT techniques for consistency: 1. Always include "Using the EXACT facial features from attached reference photo" 2. Specify: "Maintain identical facial structure, bone structure, and proportions" 3. Include: "Character must be instantly recognizable as the same person" 4. Add technical specs: "Same age, same hairline, same facial features" 5. Reference previous successful panel: "Match appearance to previously generated panel [filename]" Test prompt: "Generate [scene] featuring the EXACT same character from attached reference. Match facial features PRECISELY including [list 3-4 specific features like eye shape, nose