
In the fast-moving world of artificial intelligence, 2026 has been defined by the rise of “Agentic AI”—tools that don't just chat but actually execute tasks on your behalf. At the center of this movement is OpenClaw, an open-source personal AI assistant that has captured the attention of the global developer community. This guide will walk you through the entire process of setting up your own sovereign AI agent, from the initial installation to your very first conversation.
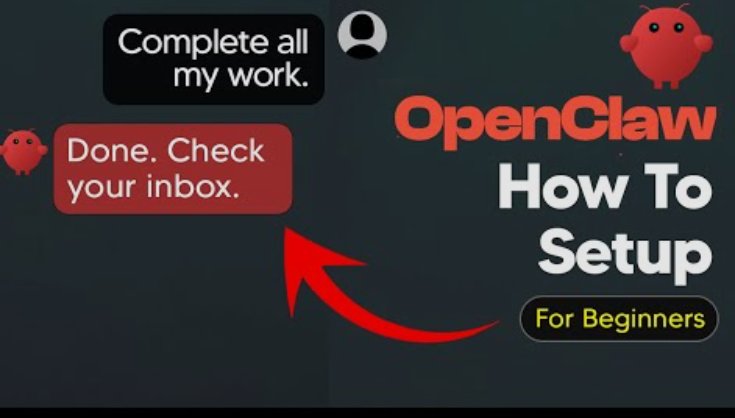
How to Set Up OpenClaw in 2026
To set up OpenClaw and start your first chat, follow these three essential steps:
-
Install the Gateway: Open your terminal and run the one-line command:
curl -fsSL https://openclaw.ai/install.sh | bash. This script automatically detects your OS and installs the necessary runtime environment. -
Onboard and Authenticate: Run
openclaw onboardand select the QuickStart option. Follow the prompts to link your preferred AI model provider (such as Google Gemini, Anthropic Claude, or OpenAI) using your account's API key or OAuth credentials. -
Link a Messaging Channel: Select a messaging platform like Telegram, provide the bot token obtained from
@BotFather, and verify your identity using the user ID from@userinfobot. Once restarted, your agent will be live and ready to receive commands via your chat app.
1. What is OpenClaw? The Evolution of the Personal AI Agent
OpenClaw (previously known as MoltBot and ClawdBot) is a conversation-first AI framework that runs locally on your system. Unlike traditional chatbots that live exclusively in a web browser, OpenClaw acts as an “autonomous agent.” It is designed to inhabit your hardware—whether that is a Mac Mini, a Linux server, or a Windows desktop—and use its high-reasoning “brain” to interact with your local files, run terminal commands, and manage your digital life across various third-party services.
The project gained viral status in late 2025 because it bridged the gap between large language models (LLMs) and real-world execution. By acting as a message router and local gateway, it allows you to send a message like “Summarize my unread emails and draft a reply to the most urgent one” from your phone, and have the AI perform those actions on your computer. It is private, extensible, and completely under your control, making it the premier choice for “Sovereign AI” enthusiasts.
2. A Brief History: From ClawdBot to OpenClaw
If you are searching for older tutorials, you might find references to names like “ClawdBot” or “MoltBot.” It is important to understand that these are all the same continuous codebase. The project was originally launched by Peter Steinberger as ClawdBot but underwent two rapid rebrands due to trademark concerns from major AI labs and the need to distance the community from identity hijacking by third-party scammers.
As of early 2026, the project has stabilized under the OpenClaw brand. The lobster mascot remains a symbol of the project's tenacity and “claws” that can grab and manipulate data. While some legacy documentation or screenshots may still show the old names, the commands and configuration structures have been unified. Staying up to date with the openclaw binary ensures you have the latest security patches and features.
3. System Prerequisites and Hardware Requirements
Before you begin the installation, you must ensure your environment is prepared. OpenClaw is designed to be lightweight, but because it handles complex reasoning and local file indexing, it benefits from a stable system.
-
Operating System: OpenClaw is cross-platform and supports macOS (Intel and Apple Silicon), Linux (Ubuntu 22.04+ recommended), and Windows 10/11 (via WSL2 or native PowerShell).
-
Runtime Environment: You must have Node.js (version 22 or higher) installed. Node.js is the engine that runs the OpenClaw service, and using an outdated version can lead to errors during the gateway startup.
-
Hardware: While it can run on a basic laptop, the community recommendation for a “forever-on” assistant is a device with at least 8GB of RAM and a multi-core processor. Many users repurpose an old Mac Mini or a dedicated Linux VPS for this purpose.
-
Connectivity: You will need an active internet connection to communicate with your AI model provider's API (e.g., Anthropic or OpenAI) and your messaging platform of choice.
4. Step 1: The One-Line Installation
The developers of OpenClaw have focused on making the installation as frictionless as possible. You no longer need to manually clone repositories or manage complex environment variables to get started.
To install OpenClaw, open your terminal and paste the following command: curl -fsSL https://openclaw.ai/install.sh | bash
This script performs several background tasks: it verifies your Node.js version, creates a hidden .openclaw directory in your home folder for configuration data, and installs the global openclaw command-line interface (CLI). If you prefer using a package manager directly, you can also run npm install -g openclaw@latest. Once the script finishes, you can type openclaw --version to confirm that the installation was successful.
5. Step 2: The Onboarding Wizard and QuickStart
After the installation is complete, you need to configure the “identity” and settings of your bot. This is handled through an interactive Terminal User Interface (TUI) called the Onboarding Wizard.
To launch it, type: openclaw onboard
The wizard will present you with two main paths: QuickStart and Custom Setup. For your first installation, QuickStart is highly recommended. It configures the system with safe defaults, sets up a local gateway on port 18789, and focuses on getting the core connectivity working. Use your arrow keys to navigate the menu and the spacebar to select your choice. This automated process handles the complexity of generating security tokens and setting up local databases, so you can focus on the AI itself.
6. Step 3: Selecting and Authenticating Your AI Provider
OpenClaw is “model-agnostic,” meaning it doesn't come with its own AI. Instead, it acts as a shell that you fill with the “intelligence” of your choice. During the onboarding process, the bot will ask you to select an AI provider.
-
Google Gemini: Often selected for its generous free tiers and “Antigravity” OAuth integration. If you choose this, the wizard will open a browser window for you to log into your Google account and authorize the connection.
-
Anthropic Claude: Widely considered the best model for “Agentic” tasks due to its high reasoning and adherence to complex instructions. You will need to provide an API key from the Anthropic Console.
-
OpenAI GPT-4o: A reliable all-rounder. Similar to Claude, this requires an API key from the OpenAI developer platform.
-
Local Models (Ollama): For the privacy-conscious, OpenClaw can connect to local models running via Ollama. Note that this requires significant local GPU power to maintain a fast response time.
7. Step 4: Connecting to Telegram (or Your Preferred Chat App)
The most common way to interact with OpenClaw is through a messaging app. While WhatsApp and Discord are supported, Telegram is the easiest to set up for a first-time user because of its robust Bot API.
-
Create the Bot: Open Telegram and search for @BotFather. Send the
/newbotcommand and follow the prompts to give your bot a name (e.g., “MyOpenClaw”) and a username. -
Get the Token: BotFather will provide a long string called an API Token. Copy this carefully.
-
Input the Token: Back in your terminal, the OpenClaw wizard will prompt you to “Paste your Telegram token here.” Paste the token and hit Enter.
-
Identify Yourself: To prevent strangers from talking to your bot, you must provide your Telegram User ID. You can get this by messaging @userinfobot on Telegram. Copy the numerical ID and paste it into the terminal when prompted.
8. Step 5: Finalizing Skills and Starting the Gateway
Once your chat channel is linked, the wizard will ask if you want to configure “Skills.” Skills are specialized modules—written in JavaScript or Python—that allow your bot to perform specific tasks like checking your calendar, searching GitHub, or controlling smart home devices.
For your very first setup, it is often best to Skip for now or select the default skills. You can always add more skills later as you become comfortable with the agent's behavior. After finishing the wizard, the terminal will indicate that the configuration is saved. Now, you must start the background service that keeps your bot alive: openclaw gateway start
If you are on a server and want it to run permanently, you can use openclaw gateway start --daemon. This ensures that even if you close your terminal, the AI remains active and ready to respond to your messages.
9. Security and Privacy: Best Practices
Because OpenClaw can execute commands on your local machine, security is of paramount importance. The 2026 security landscape requires users to be proactive about their data safety.
-
Non-Privileged User: Never run OpenClaw as the
rootorAdministratoruser. If a vulnerability were exploited, the attacker would have full control over your system. Run it under a standard user account with restricted permissions. -
Treat Tokens as Passwords: Your Telegram token and LLM API keys are essentially the keys to your house and your wallet. Never share them in public GitHub repositories or screenshots.
-
Use a Dedicated Directory: Keep OpenClaw’s working files in a dedicated folder (like the default
~/.openclaw) to ensure it doesn't accidentally read or overwrite sensitive personal documents unless explicitly told to do so. -
Start in “Safe Mode”: Initially, avoid giving the bot permission to run “destructive” shell commands (like
rmorformat) until you have observed its behavior in a sandbox environment.
10. Conclusion: Your AI Assistant is Ready
Congratulations! You have successfully moved from a blank terminal to a fully operational, sovereign AI assistant. By integrating OpenClaw with your choice of LLM and a messaging platform like Telegram, you have created a tool that can grow with you.
As you become more advanced, you can explore “Agent Swarms”—where multiple instances of OpenClaw work together on a single project—or deep-dive into the “Soul” configuration files to give your bot a specific personality or specialized domain knowledge. The future of AI isn't just about asking questions; it's about getting things done. With OpenClaw, you now have the tools to do exactly that.