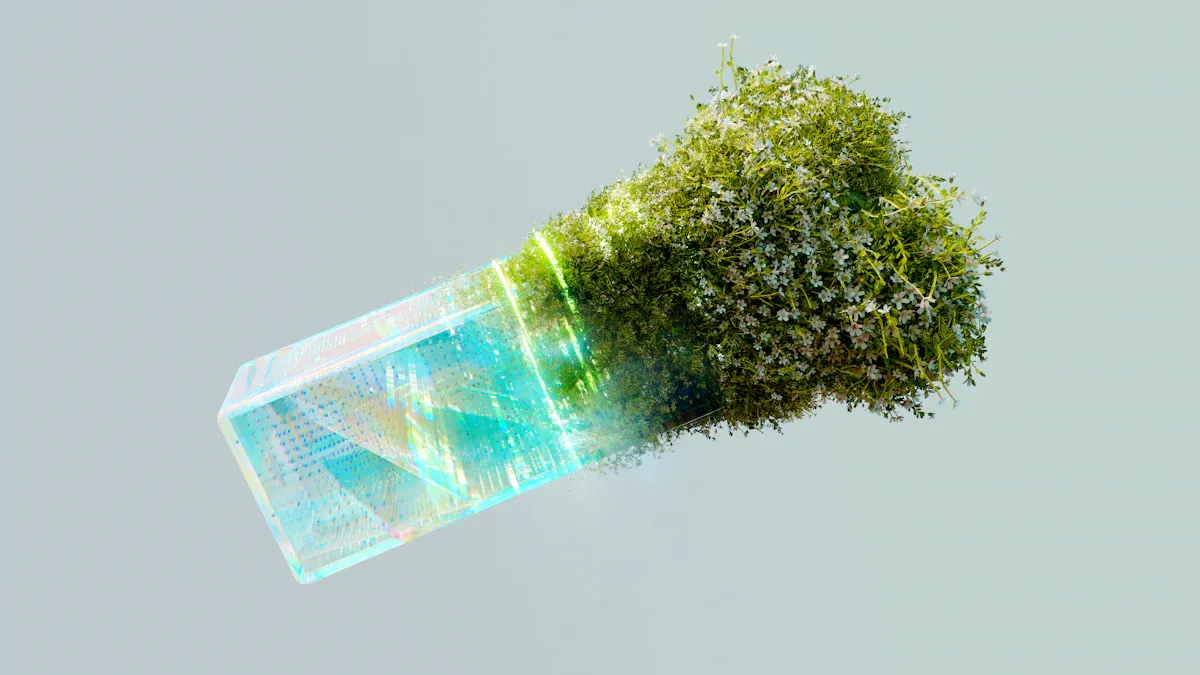
You can quickly make an image background bigger with AI extend photoshop. Sometimes, you need more room on the sides of your picture for a social media post or a flyer. You do not need to be an expert to get a natural look. Even if you are new to Photoshop, you can use this tool. It helps you make an extension that matches your original image very well.
Key Takeaways
-
AI Extend in Photoshop lets you make backgrounds bigger fast. The image still looks good and does not lose quality.
-
Pick and copy layers to keep your main image safe. This also helps the AI work better.
-
Use Generative Expand and give clear instructions to the AI. This helps the AI make smooth and matching backgrounds.
-
Make sure colors match and edges blend well. This makes the new background look real and smooth.
-
Practice using AI tools with layers, masks, and adjustment layers. This helps you make edits that look professional and can be changed easily.
AI Extend Photoshop
What Is AI Extend?
You can use ai extend photoshop to make your pictures bigger. It does not make the quality worse. This tool uses ai to look at your photo and add new parts that fit in. If you want more space in your picture, ai image extender in photoshop helps you do this fast. You do not have to copy and paste parts by hand. The ai does this work for you.
Photoshop uses deep learning like convolutional neural networks and generative adversarial networks. These smart systems check patterns, colors, and textures in your photo. They make new areas that look like the real thing. The result looks smooth and natural. You can use ai extend photoshop to make backgrounds wider or taller. You can even make new backgrounds from nothing.
Tip: You can use ai extend photoshop with other photoshop ai tools for better results. Try using layers and masks to mix the new parts with your picture.
Key Benefits
There are many good things about using ai extend photoshop. Here are some main ones:
-
You save time. The ai image extender is much faster than doing it by hand.
-
You get smooth results. The ai background extender matches colors and textures for a real look.
-
You can make images bigger, add things, and make new backgrounds with ai.
-
You can use other pictures to help ai make better results.
-
You can get different choices with ai, so you can pick your favorite.
Old ways in photoshop, like cloning or patching, can leave lines or mistakes. Ai tools, like Content-Aware Fill, look at the area around your pick and fill it in smartly. You still have control. You can use layers, masks, and blending modes to make it look just right. Ai extend photoshop gives you speed and good quality, so it is a great choice for anyone who wants to make images bigger.
Getting Started
Prepare Your Image
Start your image editing project by opening your photo in Photoshop. Make sure you use a high-quality file. This helps the AI tools work better. Look at your image and decide where you want to expand the background. You might want more space on the left, right, top, or bottom. Use the zoom tool to check the edges. This step helps you plan your selection.
You need to make a clean selection for the best results. Use the Rectangular Marquee Tool for a simple selection. If your image has a complex edge, try the Lasso Tool. Make your selection as close to the edge as possible. This helps the AI extend the background smoothly. You can use the Shift key to add to your selection or the Alt key to subtract from it. Try to avoid including important objects in your selection. Focus only on the background area.
Tip: A careful selection gives you a better result when you use AI extend. Take your time with this step.
Duplicate Layers
Before you start any image editing, always duplicate your layer. This keeps your original safe. Right-click your layer in the Layers panel. Choose “Duplicate Layer.” Name the new layer so you can find it easily. You can now work on the duplicate without worry.
When you make a selection, work on the duplicate layer. This lets you undo mistakes. If you do not like the result, delete the duplicate and try again. You can also use multiple duplicates for different selection areas. This method gives you more control over your image editing process.
Note: Duplicating layers is a smart habit in image editing. It protects your work and makes fixing errors easy.
Step-by-Step
Making a background bigger in Photoshop with AI is easy. You just need to follow some simple steps. You can use AI Extend Photoshop and Photoshop AI Generative Fill. These tools help you get smooth results. You can make your images bigger and even create new images.
Crop Tool
First, open your image in Photoshop. Use the Crop Tool to make your canvas larger. You can find the Crop Tool in the toolbar or press C on your keyboard. Drag the crop handles out to add more space. You will see clear areas around your picture. This is where you will add more background.
Tip: Set the Fill option to Generative Expand in the taskbar. This tells Photoshop to use AI to fill the new space with matching background.
When you finish cropping, Photoshop gets the canvas ready. You can use this way to make any side of your image bigger.
Select Area
After you make the canvas bigger, pick the area you want to fill. Photoshop has many selection tools. The Quick Selection Tool works for most backgrounds. It finds edges, colors, and textures fast. For more control, use the Magic Wand Tool for simple backgrounds. Try the Lasso Tools for shapes that are not straight.
|
Selection Tool |
Description & Effectiveness |
|---|---|
|
Quick Selection Tool |
Lets you ‘paint' selections, finds edges and textures, easy for backgrounds. |
|
Magic Wand Tool |
Picks by color, good for simple backgrounds. |
|
Lasso Tools |
Freeform, polygonal, or magnetic for careful, manual picks. |
|
Pen Tool |
Best for hard shapes and fine details. |
|
Quick Mask Mode |
Fix picks with brush tools, great for small details. |
|
Layers and Masks |
Safe editing, fix edges with masks and Refine Edge tool. |
Make sure your pick covers a little of the old image. This helps the AI blend the new background with the old one. Use Shift to add to your pick or Alt to take away. If you want to make more than one side bigger, repeat the pick for each side.
Generative Expand
Now you can use Generative Expand. This tool uses AI to fill your picked area with new background. In the Contextual Task Bar, pick Generative Expand. Photoshop will use Adobe Firefly Image Model to look at your image. It will make new background that matches your photo.
You will see three choices in the Properties panel. Pick the one you like best. If you want more, you can make new choices. The new background goes on a new layer. Your old image stays safe. You can put the layers together later if you want.
Note: Generative Expand works best with careful picks and not too much new space. This keeps the background looking real.
Enter Prompts
To get the best from Photoshop AI Generative Fill, type a prompt in the box. Tell the AI what kind of background you want. For example, you can write “extend background with blue sky and soft clouds” or “add more forest to the left.” The AI will use your words to make a background that fits your idea.
-
Try different prompts to see what you like.
-
Use clear picks for smoother blending.
-
Layer more picks to make backgrounds with different looks.
You can change your prompt if you do not like the first try. This helps you make your background in new ways and even make special images.
Tip: Use Generative Fill and Generative Expand together for the best look. First, make the canvas bigger and use Generative Expand. Then, use Photoshop AI Generative Fill to fix the background or add new things. You can also use the Clone Stamp or Spot Healing Brush to fix small problems and blend the edges.
If you follow these steps, you can use AI Extend Photoshop and Photoshop AI Generative Fill to make backgrounds bigger, create new images, and make your photos look great. Try different picks, prompts, and tools to get better at this process.
Extend Background
Expanding your image background with Photoshop AI tools can look seamless if you pay attention to color and edge blending. You want the extended background to match the original, so viewers cannot tell where the extension starts. Here are some practical ways to make your background extension operation look natural.
Match Colors
When you extend background areas, color differences can make the new parts stand out. You can use several methods in Photoshop to match colors between the original and the extended background. Try these steps to get a smooth result:
-
Open your image and unlock the layer.
-
Use the Crop tool to increase the canvas size in the direction you want to extend image background.
-
Select the new transparent area created by the extension.
-
Use Content-Aware Fill or Generative Expand to fill the area.
-
Select the Brush Tool and sample colors from the original background by holding Alt and clicking.
-
Paint over the extended background with a large, low-opacity brush. This helps blend the colors naturally.
-
Work on a new layer to keep your original image safe.
You can also use the Match Color feature for more control:
-
Open both the source image (with the colors you want) and the target image (the one you want to adjust).
-
Select the target layer.
-
Go to Image > Adjustments > Match Color.
-
In the dialog, pick the source image from the dropdown.
-
Adjust the Fade slider to control how strong the color match is.
-
Fine-tune the luminance and color intensity sliders.
-
Preview the changes and click OK when you are happy.
For even finer adjustments, try a Curves Adjustment Layer:
-
Clip it to the extended background layer using a clipping mask (Ctrl+Alt+G).
-
Hold Alt and click the Auto button on the Curves layer to open Auto Color Correction Options.
-
Adjust the color tones until the extended background blends with the original.
Tip: Always zoom in and check your work. Small color shifts can make a big difference in how natural your extended background looks.
Blend Edges
After you match colors, you need to blend the edges between the original and the extended background. Hard lines or visible seams can ruin the effect. Use these steps to create a smooth transition:
-
Fill the mask with white. Then, use a soft, low-opacity brush set to black to gently paint around the edges. This fades the edges and helps the backgrounds merge.
-
Blur the mask edges or use a radial gradient on the mask for an even softer blend.
-
If you see a seam, select the area with the rectangle tool and use Generative Fill to patch it.
-
Refine the patch by painting on the mask. Use black to hide and white to reveal parts of the extended background until the transition looks natural.
Note: Work slowly and check your progress often. Blending edges takes patience, but it makes your image background extension look professional.
Tips for Natural Results
-
Do not make the canvas too large when you extend background areas. Large extensions can cause Photoshop AI tools to create unnatural fills or visible artifacts. You might see faint lines at the edge of the original photo, especially on solid backgrounds.
-
Complex textures and lighting can be hard for AI to copy. If you notice noise patterns or strange transitions, try using Content-Aware Fill or the Patch Tool for better results.
-
Always review the extended background at full size. Look for color mismatches, hard edges, or repeated patterns. Fix these with the Brush Tool, layer masks, or adjustment layers.
Remember: The best image background extension comes from careful color matching, edge blending, and not pushing the extension too far. Practice these steps, and your extended background will look just like the original.
Photoshop AI Generative Fill
When to Use
Photoshop ai generative fill is helpful for many things. You can use it to make backgrounds bigger, take out objects, or add new things to your photos. This tool uses ai to look at your picture and make new parts that fit in well. It gives you more control than simple tools like content-aware fill or content-aware scale.
Here are some good times to use photoshop ai generative fill:
-
You want to make a tricky or wide background bigger and need it to look real.
-
You need to take out or swap objects and want the fill to blend in.
-
You want to add new things or textures that match your photo’s style.
-
You need smart content-aware tools for a pro look.
-
You want to tell the ai what to do with prompts for better fills.
With photoshop ai generative fill, you can work with your photo in new ways. You pick an area, type a prompt, and see different choices. This makes it easy to try ideas and pick what you like best. You can also change details and how the new parts look to fit your needs.
Tip: For easy background changes, content-aware fill or content-aware scale might be enough. For harder edits, photoshop ai generative fill works better.
Combining Tools
You get the best edits by using photoshop ai generative fill with other photoshop tools. Start with content-aware fill or content-aware scale for simple changes. Then use generative fill to fix the area and add more detail. This way, your edits look smooth and real.
Try these steps to mix tools for a natural result:
-
Use the Object Selection Tool to pick the right area before using photoshop ai generative fill.
-
Do first edits with content-aware fill, then use photoshop ai generative fill for better blending.
-
Add adjustment layers to fix colors, light, and shadows after using generative fill.
-
Use layer masks to choose where the ai-made parts show up.
-
Try the Clone Stamp or Healing Brush to fix small spots and blend edges.
-
Work with high-quality images for better edits.
-
Give clear, simple prompts to photoshop ai generative fill so the ai understands.
-
Change the fill layer’s opacity and blend modes to match your photo.
You can also use photoshop ai generative fill to take out backgrounds or mix different photos. If you remove or swap objects, try no prompt so the ai fills the space using nearby pixels. This often looks natural.
Note: Do not pick too big an area. Smaller picks help photoshop ai generative fill make better and more real-looking edits.
Backgrounds Tips
Effective Prompts
You can get the best results from Photoshop AI when you use clear and detailed prompts. The way you write your prompt helps the AI generate backgrounds that look real and fit your needs. Here are some steps you can follow to make your prompts more effective:
-
Start by saying what kind of image you want. For example, you might want a photo, a painting, or a composite.
-
Name the main subject first. This tells the AI what to focus on before it creates the background.
-
Describe the background scene. You can say things like “in a bright forest” or “with a soft blue sky.”
-
Add details about the style or mood. Use words like “vibrant,” “elegant,” or “minimalist” to guide the colors and feeling.
-
Include texture details if you want the background to match or contrast with your subject.
-
If you want to match a brand or theme, mention colors or values that fit your project.
-
Try using image prompts or reference photos to help the AI generate backgrounds that match your vision.
Tip: Use a prompt like “photo of a person in a sunny park, realistic style” to help the AI generate backgrounds that look natural and well-composed.
You can also use assisted prompts or manual prompts. Assisted prompts let you pick from options, while manual prompts give you full control. Both ways help you create unique composite images that stand out.
Avoid Mistakes
When you use AI tools to generate backgrounds, you can avoid common problems by following these generative fill tips:
-
Only select the area you want to change. Large or wrong selections can change too much of your background.
-
Avoid using vague words like “add” or “make.” Instead, describe what you want the background to look like.
-
Use negative prompts, such as “without people,” if you want to keep certain things out of your background.
-
Always blend the new background with feathering or opacity adjustments. This helps your composite look smooth.
-
Do not expect perfect results on complex backgrounds or uncommon subjects. Sometimes, you need to fix small details by hand.
-
Use the Generative Expand tool from the Crop tool to extend your background in a natural way.
-
Remember that generative fill tips work best with simple backgrounds, like trees or skies, because the AI has seen many examples of these.
Note: Skilled editing is still important. AI helps you generate backgrounds quickly, but you need to check and adjust the composite for the best results.
Troubleshooting
Artifacts
When you use AI Extend in Photoshop, you might see marks or patterns called artifacts. These can show up if your picture is low quality or has lots of compression, like some JPEGs or PNGs. You can stop most artifacts by starting with a high-quality RAW image. Before using AI Extend, look at your picture for noise or blurry spots.
Here are some ways to help lower artifacts:
-
Pick a high-quality image for your selection. Stay away from pictures with lots of compression.
-
Use noise reduction tools before or after using AI Extend.
-
Change sharpening and texture settings after you expand your selection.
-
Try other tools that remove artifacts if you still see problems.
-
Always check your selection at 100% zoom to find small issues.
Tip: If you see noise after you expand your selection, use Photoshop’s noise reduction filter to fix it.
Inconsistent Results
Sometimes, AI backgrounds do not match your picture. You might see weird colors, patterns, or edges that do not fit. How you make your selection can change the results. If your selection is too close, the AI might not blend the new area well. Try making a bigger selection around the part you want to change.
Try these steps for better results:
-
Make a bigger, loose selection instead of a tight one.
-
For big pictures, fill smaller parts one at a time.
-
Use layer masks to blend fills and fix edges.
-
Use the Healing Brush or Clone Stamp to smooth the change between your selection and the old picture.
-
Keep your selection under 1024 pixels for the best quality.
-
Use simple prompts for your selection, like “sky” or “grass.”
-
Try new prompts if your first try does not look right.
-
Always update Photoshop to get the newest fixes.
-
Use high-resolution images for your selection to get better results.
-
Leave the prompt box empty when you want to remove things from your selection.
Note: If your selection still looks strange, make a new selection and try again.
Access Issues
You might not see the AI Extend or Generative Fill options in Photoshop. This can happen for a few reasons:
-
You are not using the newest version of Photoshop.
-
إن Contextual Task Bar is not turned on, so you cannot use Generative Fill after making a selection.
-
Your subscription does not have AI features.
-
Sometimes, your selection is too small and does not start the AI tools.
To fix these problems:
-
Update Photoshop to the latest version.
-
Turn on the Contextual Task Bar from the Window menu.
-
Check your subscription to make sure you have AI features.
-
If you still cannot use AI Extend after making a selection, ask Adobe support for help.
Remember: Always check your selection and Photoshop settings before you start editing.
Making backgrounds bigger in Photoshop with AI Extend and Generative Fill is quick and simple. You can work faster, keep your image looking good, and mix new parts in so they look smooth.
|
Advantage |
Benefit |
|---|---|
|
You can finish edits fast for any project |
|
|
Realism |
The results look real and natural |
|
Flexibility |
You can use it for many creative ideas |
-
If you practice often, you will get better at writing prompts and blending your edits.
-
Using layer masks and adjustment layers can help you get great results.
-
Many people who design images think these tools work better than doing everything by hand.
Try using different prompts, play with your pictures, and share what you make in online groups like Adobe forums to learn even more.